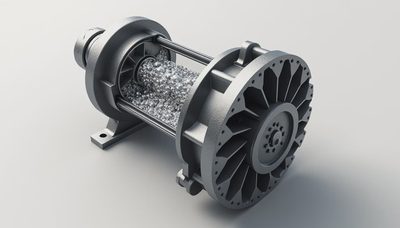
At a copper mine outside Calama, Chile, a 250-ton haul truck came into the shop with a steering complaint. The operator said the wheel felt heavy during the first turn of his shift, then improved after the machine warmed up. A hurried technician blamed the steering valve. The real problem was a restricted suction screen and a pump starving for oil. The pump survived long enough to get the truck home, but the repair bill still ran into five figures. This hydraulic system troubleshooting guide starts with the lesson that saved us from a worse failure: do not replace an expensive component until you prove what the oil, pressure, temperature, and flow are doing.
Hydraulic faults rarely announce themselves with one clean symptom. Slow cylinders, chatter, drift, hot oil, noisy pumps, and foamy reservoirs often overlap. Work from the simple checks toward the specialized tests, and record every reading. Guessing is how a $40 hose clamp turns into a $12,000 pump rebuild.
Start With Safety and the Basic Evidence
Park on firm ground, lower every attachment, apply the parking brake, stop the engine, and release stored pressure according to the machine service procedure. A raised boom, blade, or bucket can kill someone if a valve shifts or a hose fails. Never use your hand to search for a leak. A pinhole stream can inject oil through skin and require emergency surgery.
Safety Alert: Hydraulic oil can remain hot and pressurized after shutdown. Wear eye protection, gloves suited to the fluid, and face protection when opening lines. Block or mechanically support suspended equipment; the hydraulic circuit is not a reliable stand.
Before touching a valve, walk around the machine. Look for wet fittings, rubbed hoses, damaged guards, loose clamps, cracked reservoirs, and oil around cylinder rods. Check the level with the machine positioned as specified by the manufacturer. Low oil can pull air into the pump, while overfilling can cause foaming and heat. Ask the operator when the symptom appears: cold start, high load, steering, travel, or simultaneous functions. That timing is valuable evidence.
Field Lesson: On a D11 in Western Australia, a “weak tilt” complaint turned out to be a hose rubbing against a frame brace. The hose had not burst yet, but its outer cover was gone and wire reinforcement was exposed. The fix was routing and clamping, not a new pump.
Hydraulic System Troubleshooting Guide for Pressure and Flow Problems
Pressure and flow are different measurements, and confusing them wastes days. Pressure is resistance to flow. Flow determines how quickly a cylinder or motor moves. A machine can show normal standby pressure while delivering inadequate flow from a worn pump.
Install gauges at the test ports listed in the service manual, using hoses and fittings rated for the circuit. Compare standby pressure, pilot pressure, and relief pressure with the manufacturer’s specifications. Do not deadhead an unknown circuit simply to watch a gauge climb. A relief test can generate extreme heat and damage components if held too long.
If a function is slow but reaches rated pressure, suspect restricted flow, a worn pump, a compensator problem, or excessive internal leakage. If the function is weak and pressure never reaches specification, check the relief valve, control signal, suction supply, and pump inlet before condemning the pump. If every function is slow, look upstream at oil level, inlet restriction, pump drive, common relief settings, and engine speed. If only one function is affected, focus on that valve section, hose, actuator, or load-sense signal.
A flow meter gives better evidence than pressure alone. Compare pump output at a specified engine speed and temperature. A pump that produces acceptable flow cold but loses output hot has internal wear or excessive leakage. Record oil temperature during testing; a reading that climbs rapidly under ordinary work points to energy being lost across a relief valve, compensator, restriction, or leaking actuator.
What Noise, Heat, and Foam Are Telling You
A healthy hydraulic pump has a consistent operating sound. Whining, growling, or rattling deserves immediate attention. Cavitation occurs when the pump cannot obtain enough oil at its inlet. Common causes include low reservoir level, a plugged suction strainer, collapsed inlet hose, blocked breather, incorrect oil viscosity, or a loose connection pulling air into the suction side.
Aeration is different. Air enters the oil through a suction leak, then creates foam and erratic movement. Inspect clamps, O-rings, flange seals, and the return line outlet. If the return line ends above the oil surface, it can churn air into the tank. Milky or frothy oil is not something to work through; correct the cause before more components suffer.
Hot oil accelerates seal wear and reduces viscosity. Check the cooler for packed dirt, bent fins, and poor airflow. Then check whether the hydraulic fan, bypass valve, or temperature-control circuit is working. A machine that runs hot only when two functions are operated may have a relief valve bypassing continuously. A machine that heats while parked can have an unloading or control problem.
I've seen this go wrong. Here's how you avoid it: never silence a noisy pump by adding heavier oil without finding the restriction. The machine may sound better briefly while the pump continues to destroy itself.

Contamination and Cylinder Drift
Clean oil is a hydraulic component. Dirt damages spool clearances, pump plates, servo controls, and cylinder seals. When a repair opens the circuit, cap every hose and port immediately. Do not wipe fittings with a dirty rag and then connect them. Clean the connection first, use lint-free material, and protect replacement parts until installation.
If a cylinder drifts with the control in neutral, isolate the possibilities. Drift can come from cylinder piston-seal leakage, a leaking control valve, a load-check problem, or an external valve in the circuit. With the attachment safely supported, compare drift behavior under load and with the cylinder disconnected where the service procedure permits. Do not put anyone beneath a suspended attachment during this test.
Take an oil sample when the problem is unexplained, recurring, or accompanied by component damage. A laboratory can identify wear metals, water, wrong viscosity, and particle contamination. Cut open the hydraulic filter and inspect the media. Shiny metal, fiber, rubber pieces, or a gray paste each point toward a different failure path. Replace a failed pump without flushing contaminated oil and you may sacrifice the replacement before the first shift ends.
A Field-Proven Diagnostic Sequence
Use this hydraulic system troubleshooting guide in order rather than jumping between theories.
- Confirm the complaint with the operator and reproduce it safely.
- Inspect oil level, color, smell, leaks, hoses, clamps, and the reservoir breather.
- Verify engine speed and check for obvious drive-coupling damage.
- Measure pressure at the correct test ports using rated equipment.
- Measure flow at the specified oil temperature and engine speed.
- Compare one affected function with an unaffected function.
- Check filters, suction screens, cooler airflow, and contamination evidence.
- Test the suspect valve, actuator, pump control, or motor only after the upstream checks pass.
- Document readings, parts replaced, oil added, and the final operating temperature.
A repair order should tell the next technician what was proven, not just what was changed. “Installed pump” is not a diagnosis. “Pump delivered low flow at rated speed after inlet restriction was cleared” is useful information.
When to Stop and Call a Specialist
Stop field troubleshooting when the machine has uncontrolled movement, a cracked pressure line, suspected accumulator damage, metal contamination, repeated pump failure, or pressure outside the test equipment’s rating. Accumulators store energy even with the engine off and require the correct charging equipment and procedure. Do not loosen an accumulator fitting as a test.
A dealer such as Caterpillar, Komatsu, Deere, or Volvo can provide model-specific test procedures, calibration data, and replacement parts. An independent hydraulic shop can often test pumps, motors, cylinders, and valves on a bench for less than the cost of repeated guesses. Bring your pressure and flow records, oil sample results, filter photos, and machine serial number.
The best hydraulic system troubleshooting guide is not a shortcut around testing. It is a way to make testing disciplined. Start safe, prove the basics, measure pressure and flow, control contamination, and know when the machine has crossed from field repair into specialist work. That approach kept iron moving from Colorado to Indonesia, and it will save more downtime than any confident guess beside a leaking pump.