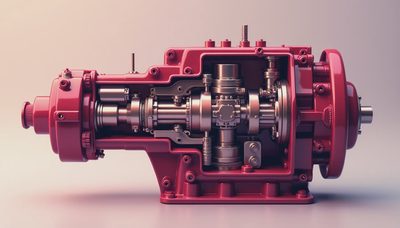
The first excavator hydraulic pump repair job I remember from a copper site in Chile started with a machine that would barely swing. The operator blamed the pump, and the owner had already priced a replacement. Before we pulled anything, I found a collapsed suction hose liner and a return filter packed with black debris. The pump was damaged, but it was not the first failure. It was the victim. I've seen this go wrong. Here's how you avoid it.
A hydraulic pump does not create power by magic. It moves oil, while the engine, control valves, relief valves, cylinders, motors, hoses, and oil cooler determine how that flow becomes work. A weak boom, slow travel, noisy pump, or hot hydraulic tank can point to several faults. Replacing the pump without proving the failure can turn a $1,500 diagnostic problem into a $15,000 parts bill.
Start With Symptoms, Not the Pump
Good excavator hydraulic pump repair begins with a clear failure description. Ask what changed first. Did the machine lose every function at once, or did boom force disappear while travel stayed normal? Does the problem appear only after the oil warms up? Is the pump quiet, whining, rattling, or producing a sharp squeal when the joystick reaches the end of its stroke?
Record engine speed, hydraulic oil temperature, cycle times, and the functions affected. A machine that is slow in every function suggests a supply, control, or pump-flow problem. One weak function points more toward a spool, line relief valve, cylinder, or motor circuit. If one pump section runs the boom and arm while another handles travel or swing, the pattern can tell you which section deserves attention.
Check the simple things before connecting expensive test gear. Verify the hydraulic oil level on level ground using the manufacturer’s procedure. Inspect the suction hose, clamps, tank breather, return filter indicator, and oil for foam or a burnt smell. Look for fresh leaks around the pump shaft seal and case drain line. A loose suction connection can draw air without leaving an obvious oil puddle.
The Tests That Separate a Bad Pump From a Bad System
For serious excavator hydraulic pump repair, pressure and flow tests matter more than a confident guess. A pressure gauge can show whether a circuit reaches its relief setting, but pressure alone does not prove the pump is healthy. A worn pump may build rated pressure with little flow. That machine can look acceptable on a gauge and still take twice as long to fill a trench.
Use the service manual’s test ports and specifications. Measure standby or neutral pressure, pilot pressure where applicable, main relief pressure, and working pressure under controlled load. A flow meter is the better tool for checking pump output at a known engine speed and oil temperature. Compare actual flow against the manufacturer’s specification instead of comparing it with a different excavator in the yard.
The case drain deserves special attention. Excessive case-drain flow usually indicates internal wear in a piston pump, although the exact limit depends on pump design and temperature. Capture the drain oil safely, measure it according to the service procedure, and do not put your hand near a suspected pinhole leak. Hydraulic oil injected under skin can require emergency surgery even when the puncture looks like a scratch.

Field Lesson: On a 330-size excavator in western Colorado, a technician condemned the main pump after finding low bucket force. The actual fault was a relief cartridge contaminated with seal material. Cleaning the valve and replacing the damaged seals restored the machine in one shift. The pump had good flow and never needed removal.
Safety Comes Before Pressure Testing
Safety Alert: Never crack a hydraulic fitting while the engine is running or assume the system is depressurized because the controls feel dead. Park on firm ground, lower the attachment, shut down, isolate the machine, and release stored pressure according to the service manual. Accumulators and pilot circuits can retain energy after shutdown.
Block or support raised equipment with approved mechanical supports. Do not rely on a hydraulic cylinder to hold an attachment while you work beneath it. Wear eye protection, gloves suited to the task, and clothing that will not catch on rotating components. Clean test-port areas before connecting gauges; a grain of grit can damage a quick coupler or contaminate the circuit.
If the pump has failed catastrophically, treat the oil and filters as evidence. Cut the filter open with the correct tool and inspect for bronze, steel, aluminum, or rubber particles. Flush contaminated lines, clean the tank, inspect the cooler, and determine whether the control valves and motors need inspection. Installing a rebuilt pump into contaminated oil is how a repeat failure gets scheduled.
Rebuild, Replace, or Send It Out?
The right excavator hydraulic pump repair option depends on damage, parts availability, and the value of downtime. A seal kit and bearing job can be sensible when the rotating group and housing remain within specification. A heavily scored barrel, broken retainer, or damaged valve plate usually calls for a qualified remanufactured unit or a specialist rebuild.
A reputable hydraulic shop should provide a test-bench report, identify the pump model and displacement, and explain what was replaced. Ask whether the shop checks rotating-group clearances, servo controls, compensator settings, and case-drain performance. A freshly painted housing is not proof of a proper rebuild. Neither is a low price that excludes calibration or warranty coverage.
Typical costs vary widely. A minor seal repair may run several hundred dollars in parts plus labor. A professional pump rebuild can land around $3,000 to $8,000, while a new OEM assembly for a large excavator can exceed $10,000. Add removal, flushing, filters, oil, hoses, and transportation before approving the job. A fast exchange unit can be cheaper than a week of idle equipment, but verify the core charge and warranty terms.

Installation Is Part of the Repair
Many failures blamed on rebuilt pumps begin during installation. Confirm rotation, displacement, mounting dimensions, shaft engagement, and control configuration before lifting the replacement into place. Replace damaged O-rings, use the specified hydraulic oil, and inspect the suction hose for soft spots or internal separation. Do not use thread sealant where the manufacturer specifies an O-ring or bonded seal.
Prime the pump as required. Some designs need the housing filled with clean oil before startup, while others depend on a charged suction circuit. Cranking a dry pump for even a short time can destroy a new rotating group. Start at low idle, watch the oil level, and operate functions gradually. Listen for cavitation, check case drain, and stop immediately if the pump screams or the tank foams.
After warm-up, retest pressure, flow, cycle times, and leakage. Change filters after the initial run if contamination was present, then inspect the removed filter. Record the oil type, machine hours, test readings, and parts installed. That record helps the next technician distinguish a new fault from an old one.
When to Call a Hydraulic Specialist
Call a qualified shop when the pump has metal contamination, unstable compensator pressure, excessive case drain, or a damaged shaft or housing. Also stop if you lack the correct flow meter, calibrated gauges, lifting equipment, or service data. Improvised testing around high-pressure hydraulics is not a badge of experience; it is how people get hurt.
The best excavator hydraulic pump repair is often the one that prevents a second failure. Diagnose the whole circuit, protect the replacement from dirty oil, and prove performance with measurements. I spent two weeks on that Chilean site. Here's what I learned: the pump is rarely alone in the story. Find the cause, not just the broken part, and the excavator will earn its way back to work.